
Reviewed · WALKING TOURS
Best of Lucerne Walking Photography Tour
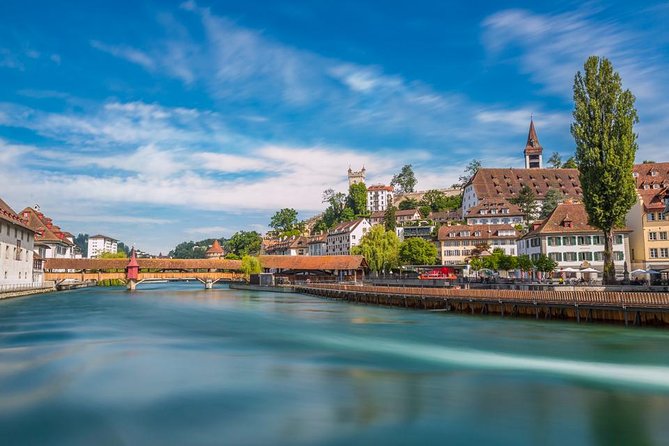
Lucerne is gorgeous, but the framing matters. This small-group Lucerne walking photography tour pairs a pro photographer guide with real photo stops, so you learn how to shoot Chapel Bridge and the lake-and-alps views with more intention. You’ll also get practical coaching on angles and settings, but there is some uphill walking and you’re on a tight 2-hour schedule.
What I like most is the balance of sights and instruction. You move location to location around central Lucerne, and the guide turns each stop into a quick lesson you can actually use right away. One consideration: you’ll need to manage your expectations on time. You can get great shots, but you won’t have hours at each viewpoint.
If you want a tour that feels more like photo mentorship than a sightseeing checklist, this is a strong pick. The guide Luis is often praised for patient help, including lens adjustments, and for sharing historical context you can see in your photos. If you’re using a Nikon, a compact, or just your smart phone, the coaching is built for real cameras and real people.
In This Review
- Key Highlights That Make This Photo Walk Worth It
- How This Lucerne Photo Tour Works (No Fancy Gimmicks)
- Starting Point and What to Expect Before You Walk
- Chapel Bridge Framing: Turning a Postcard Icon Into Your Shot
- Lake Lucerne and Swiss Alps Views: Compose With Depth, Not Just Distance
- City Wall and the 9 Original Medieval Towers
- Castle Panorama Over Lake and Mountains
- Walking the Ancient Wall: Uphill Views and Better Photo Angles
- Fortifications and Tower Timing: What Changes by Season
- The Chaff Bridge and a Design-Oriented Photo Stop
- The Most Important Swiss Monument Stop
- Camera Skills You Actually Need (D7200 Included, Phone Also Works)
- Price and Value: Is $212.65 Worth It?
- Timing and Route Fit: 3:00 pm Walk Style
- Should You Book This Lucerne Walking Photography Tour?
- FAQ
- Where does the tour start?
- What time does it begin?
- How long is the walking photography tour?
- How big is the group?
- What language is the tour offered in?
- Do I need a specific camera?
- Is the tour physically demanding?
- What is included in the price?
- Are food and drinks included?
- Can I cancel and get a full refund?
Key Highlights That Make This Photo Walk Worth It
- Small group capped at 8, so you get attention when you’re adjusting settings or swapping lenses
- Pro photographer guide plus hands-on photography tips you can use immediately
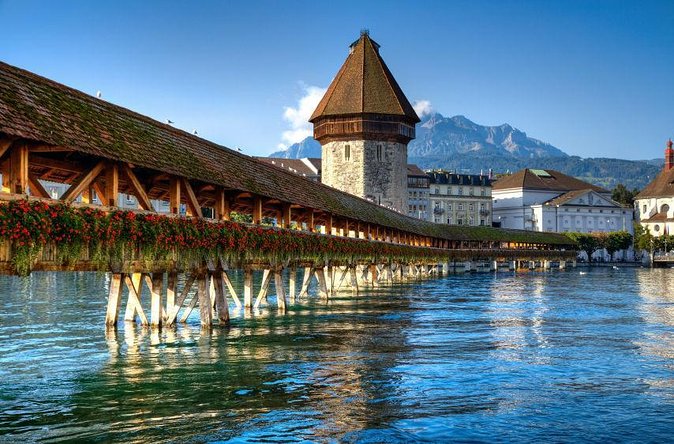
- Chapel Bridge, lake views, and Swiss Alps angles are built into the route
- City wall and 9 original medieval towers give you lots of “shooting lines”
- Castle panorama viewpoints with a bigger view over lake and mountains
- Fortification wall walk, including different tower access depending on season
How This Lucerne Photo Tour Works (No Fancy Gimmicks)
This is a 2-hour walking photography experience in central Lucerne, starting at 3:00 pm and ending back at the same meeting spot. The route is designed so you’re not just looking, you’re constantly deciding what to include in your frame, and why.
The core idea is simple: you pick up better photos fast by practicing while someone watches you shoot. That’s the real value of paying for a guide here. You’re not depending on luck or trying to figure out settings in the moment. Even if you show up with a smart phone, you’ll get advice that translates to your camera.
Another smart detail is the pacing. The tour breaks the city into “photo missions” that match the main photogenic subjects in Lucerne. The guide also adjusts how long you spend at each stop based on the group, which helps when someone needs a little extra time to get one shot right.
Starting Point and What to Expect Before You Walk
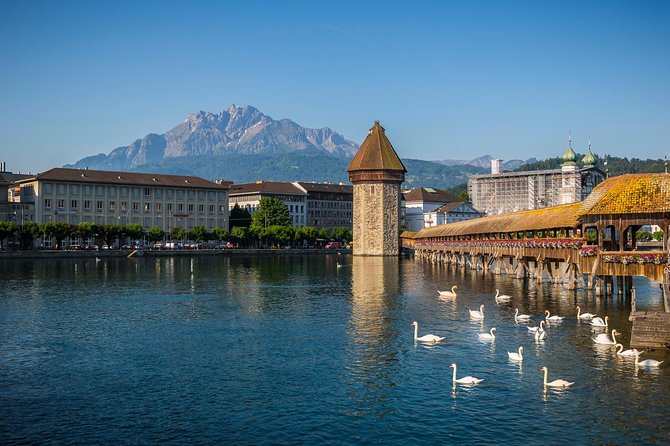
You’ll meet at Torbogen Luzern Bahnhofpl., 6003 Lucerne. That’s a practical base because it keeps you near public transportation and central walking routes. Since the tour ends back at the meeting point, you don’t have to worry about getting stranded across town.
Because this is a walking tour, you should plan for uneven old-city streets and some uphill sections. The physical requirement is listed as moderate fitness, and the route includes uphill stretches for panoramic wall views. If you’re the type who likes to take your time at viewpoints, you’ll want to keep moving when the group is called back together, or you might fall behind.
Finally, the tour is offered in English, and it works for all skill levels. You do not need a specific gear setup. The tour explicitly welcomes everything from compact and professional cameras to a smart phone. That matters, because it means the guide’s instruction is likely focused on framing, timing, and composition, not on a single technical system.
More Guided Walks in Lucerne
- Lucerne: Private Walking Tour with a Local Guide
★ 4.6 · 450 reviews - Lucerne Walking & Boat Tour: The Best Swiss Experience
★ 4.5 · 417 reviews - Lucerne: Guided Walking Tour with an Official Guide
★ 4.7 · 321 reviews
Chapel Bridge Framing: Turning a Postcard Icon Into Your Shot
Your first big anchor in Lucerne photography is the Chapel Bridge. This stop is not only about making a classic picture. You also learn the story behind it, so you understand what you’re photographing and how to show it.
In practice, a pro guide like this typically helps you choose a viewpoint that makes the bridge feel sturdy and graceful, not flat. You’ll be thinking about angles, symmetry, and how the bridge lines lead the eye. And since Chapel Bridge is a “busy” subject visually, guidance on what to exclude is just as important as what to include.
The best part of getting coaching here is that Chapel Bridge is one of those places where your first shot often looks fine, then your second shot improves once you adjust your framing. A guide pushes that second step. You’re not just capturing the landmark, you’re learning how to shoot it the way a photographer would.
If you’re traveling with a Nikon or other interchangeable-lens camera, you’ll likely appreciate the hands-on help with lens choices and adjustments. One of the recurring themes is that the guide is patient while people switch lenses to get the right look.
Lake Lucerne and Swiss Alps Views: Compose With Depth, Not Just Distance
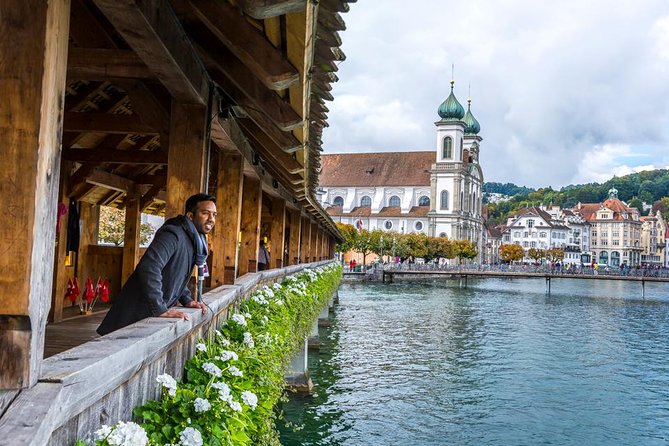
After Chapel Bridge, the route turns toward lake Lucerne and the Swiss Alps views. This part of the tour is where composition starts to matter in a different way. With landscapes, the challenge is usually not “can I see it,” but “how do I show it so it feels real.”
You’ll work on how to frame the lake so it leads the viewer’s eye toward the mountains. That usually means thinking about foreground elements, horizon placement, and how much sky to include. With Lucerne, the water can add mirror-like reflections at times, but even when reflections are limited, the lake still acts like a visual guide line.
This is also a good moment to practice switching between wide and tighter framing. Wide shots help you show scale, while tighter shots can isolate details like mountain shapes, shoreline curves, or layers of distance. The guide’s tips at each stop help you make those choices quickly instead of wandering around hoping the view magically improves.
City Wall and the 9 Original Medieval Towers
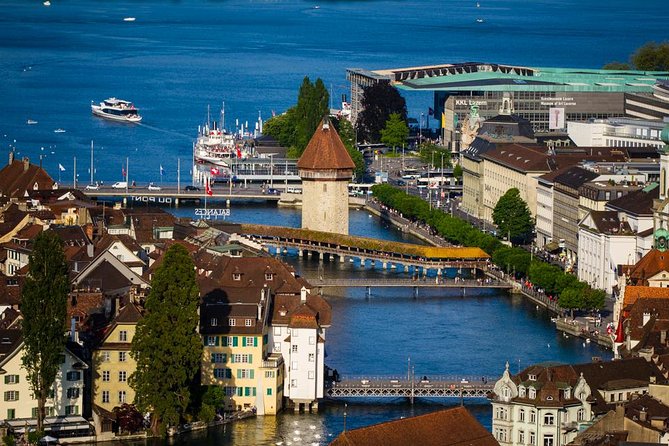
Next up is the city wall with its 9 original medieval towers. This is where photography becomes geometry. Walls and towers give you vertical lines, repeating shapes, and strong leading lines. They also give you angles that feel “architectural,” which is often a fun change from bridge-and-lake scenes.
You’ll be photographing the wall as an object, but also using it as a framing tool for the wider city. Towers can work like punctuation marks in a skyline, so your job becomes positioning them in your frame so they don’t feel like random silhouettes.
One practical benefit of this stop is that it gives you multiple micro-angles without needing to travel far. In old towns, you can usually stand in one spot and find different compositions by shifting your camera slightly. A pro guide helps you pick the spots that save time and maximize results.
Castle Panorama Over Lake and Mountains
The tour then moves to the city castle for a panorama view. This is a classic photo move in Lucerne, but it’s still worth booking because viewpoint selection changes the entire result.
A panorama stop is where you want a plan. Instead of shooting the same view five ways, you’ll get better results if you choose one composition that emphasizes the lake and mountains, and another that includes city streets or walls as context. A guide’s tips can help you get that “story” feeling, where your photo is not only beautiful, but also helps someone understand where you are.
Since the tour includes walking uphill, the castle viewpoint also rewards the effort. Your photos will likely feel more layered and more spacious than the closer shots near the water.
Higher up, or further along the lake:
- From Zurich: Mount Titlis with Ice Flyer & Lucerne Day Tour★ 4.7 · 3,899 reviews
- Lucerne: Mt. Pilatus Cable Car, Cogwheel Train & Lake Cruise★ 4.7 · 2,338 reviews
- Mount Pilatus Summit from Lucerne With Lake Cruise★ 4.5 · 1,260 reviews
- Lucerne: Round-Trip Catamaran Cruise on Lake Lucerne★ 4.4 · 1,169 reviews
Walking the Ancient Wall: Uphill Views and Better Photo Angles
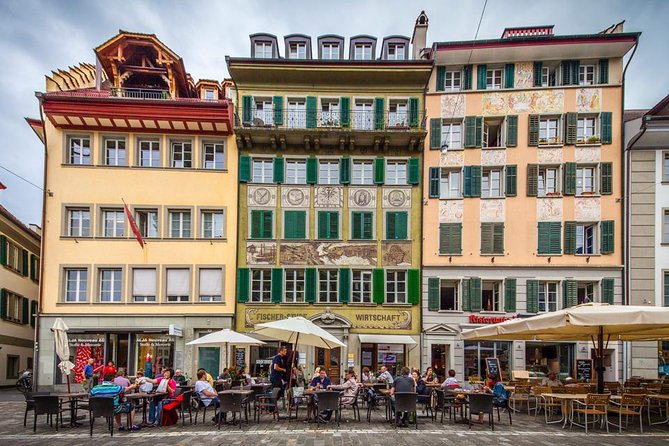
After the castle, you’ll walk along the ancient wall of Lucerne. The key detail here is that you go uphill to enjoy the most beautiful alpine panoramic views. That means you are not just casually strolling. You’re earning the viewpoint with your legs.
This stop often produces better photos because the wall gives you a natural “platform” height. From up here, you can capture both the direction of the city and the openness of the mountains and sky. It’s the kind of view where a slight change in camera position can help your horizon feel clean and your subject feel balanced.
Also, the guide’s job is to help you slow down enough to get a strong shot, without letting the group lose momentum. If you’re prone to rushing because you want to get through the route, this is where the pro coaching helps you pace yourself.
Fortifications and Tower Timing: What Changes by Season
Next is the fortification area, where the tour walks along the wall along three towers in summer. In winter, the route changes, and you walk along the wall to admire the 9 towers and the wall.
This seasonal change matters for photography. In summer, you may get fewer towers in-frame at once, which can be great if you want a cleaner composition and less visual clutter. In winter, you might get a broader tower-and-wall sweep, which can feel dramatic and “complete” in a single frame.
The broader point is that the tour is designed to keep you photographing the fortifications even when conditions change. You don’t arrive and find out the view is blocked with no plan. You follow the wall route and work with what you can access that day.
The Chaff Bridge and a Design-Oriented Photo Stop
You’ll also learn about the Chaff bridge and photograph its design. This is a shift from “big views” to a more detailed, structure-focused subject.
When you photograph a bridge design, you’re working with repeating elements, angles, and the way the bridge interacts with the water or surrounding buildings. A guide helps you spot lines you might miss while standing there thinking only about the overall look.
This stop can be a good “gear moment” too. If you have a zoom, you can experiment with tighter framing for repeating sections. If you’re on a smart phone, you can use it like a fixed lens by moving your feet to find a cleaner angle, rather than relying on zoom that often softens detail.
The Most Important Swiss Monument Stop
The tour finishes with a visit to Lucerne’s most important Swiss monument for photos. The wording here is broad, so I suggest you arrive with curiosity rather than assuming it’s only one thing. Your guide will provide context and help you frame it properly for a respectful, compelling image.
A monument photo stop works best when you treat it like a portrait scene, not a sightseeing stamp. Think about the surrounding space, how the monument sits in the frame, and what your photo communicates emotionally. The guide’s tips at this stage help you shift from architecture and scenery into a more meaningful subject.
Even if you’ve already shot a dozen landmarks, this last stop is usually what makes your photo set feel connected instead of random.
Camera Skills You Actually Need (D7200 Included, Phone Also Works)
One of the best things about this tour is the attitude toward gear and experience. All camera skills are welcome, and the tour says a compact, professional camera, or a smart phone can all produce outstanding images.
In real terms, that means the guide focuses on things you can control right now:
- framing choices, like where the subject sits in the image
- camera position, like moving a few steps to clean up a view
- timing and repetition, like taking a shot, adjusting one variable, then taking the next
- basic settings guidance that helps you get a sharper result without getting lost in technical overwhelm
If you use an interchangeable-lens camera like a Nikon D7200, you’ll likely appreciate patient help with lens changes. The tour style supports the idea that you don’t have to feel rushed or embarrassed while you figure out what lens you need for the shot.
And if you’re on a smart phone, you’re not “less prepared.” You just follow the same photo thinking, simpler tools. The result is that you leave with images that look intentional, not accidental.
Price and Value: Is $212.65 Worth It?
At $212.65 per person for about 2 hours, this tour isn’t the cheapest way to see Lucerne. But photo-guided tours are priced around one thing: focused instruction in the field.
Here’s why this can be good value:
- Small-group limit of 8 means you’re not fighting for attention
- A professional photographer guide is teaching in real time, while you shoot
- The route is packed with photogenic subjects, including Chapel Bridge, lake views, medieval towers, and fortifications
- The guide offers photography tips that help you improve faster than solo wandering
If you’re the type who likes to take photos but feels stuck, a guided photo walk often pays off quickly. You don’t need to become a pro. You just need fewer bad shots and more shots you’re proud to share.
If you already know your camera inside out and you only want to sightsee, you might feel this cost is a stretch. But if you want better results without spending hours on YouTube, this is a sensible way to buy time and coaching.
Timing and Route Fit: 3:00 pm Walk Style
Starting at 3:00 pm, you’re in the late afternoon window. That can be helpful for softer light, but the exact outcome depends on weather and season. The good news is the route is flexible by stop pacing, and the guide keeps you moving toward the next subject when the light or conditions change.
The tour is also listed as near public transportation, which makes it easier to combine with other Lucerne plans. Since you return to the meeting point, you can head to dinner afterward without a complicated transit plan.
Keep in mind: you have a short total duration. If you’re hoping for a lot of extra wandering, you may feel a little constrained. If you show up ready to shoot and listen, you’ll get more out of the time.
Should You Book This Lucerne Walking Photography Tour?
Book it if you want:
- a photo-focused walking tour built around Lucerne’s signature subjects
- hands-on help that works for any camera, including a smart phone
- a small group experience where it’s realistic to get guidance when you’re stuck
Skip it if:
- you only want a relaxed sightseeing stroll with no coaching
- you hate uphill walking, since the route includes climbs for panoramic wall views
- you want to spend lots of time in one single location, because this is a tight 2-hour loop
Bottom line: if better photos matter to you, this tour is a smart way to turn Lucerne’s top scenes into a real photography practice session, with enough structure to keep your pictures improving stop after stop.
FAQ
Where does the tour start?
The tour starts at Torbogen Luzern Bahnhofpl., 6003 Luzern, Switzerland.
What time does it begin?
The start time is 3:00 pm.
How long is the walking photography tour?
It lasts about 2 hours.
How big is the group?
The tour has a maximum of 8 travelers.
What language is the tour offered in?
The tour is offered in English.
Do I need a specific camera?
No. All camera skills are welcome, and a compact, professional camera, or a smart phone can work.
Is the tour physically demanding?
You should have a moderate physical fitness level, and the route includes uphill walking for panoramic views.
What is included in the price?
Included: a professional photographer guide, a small-group tour, and photography tips.
Are food and drinks included?
No. Food and drinks are not included.
Can I cancel and get a full refund?
Yes, free cancellation is available. You can cancel up to 24 hours in advance for a full refund.
Photo Sessions around Lucerne
- Private Lucerne Old Town Tour w/ Local Guide & Photographer
★ 5.0 · 13 reviews - Lucerne by Night Photo Tour
★ 5.0 · 9 reviews - Private Lucerne Old Town Tour – Local Guide & Photographer
★ 5.0 · 8 reviews - Essential Lucerne Photography Tour
★ 5.0 · 7 reviews
Added lately around Lucerne

Walking Tours, compared.
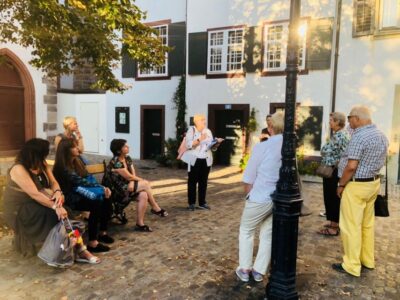
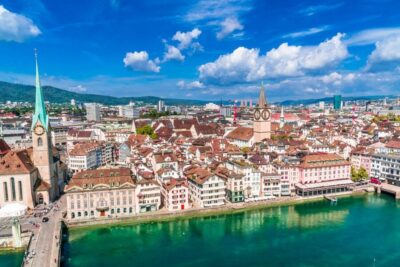
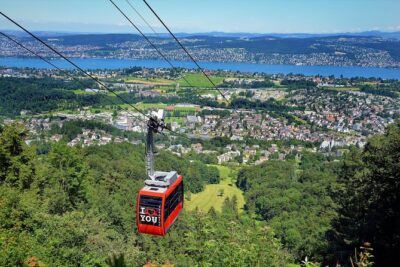
Zurich Walking Tour With Cruise and Aerial Cable Car
Read our review →
Lucerne Walking & Boat Tour: The Best Swiss Experience
Read our review →
3 in 1: Zurich Walking Tour – Cruise on the Lake – Cable Car Ride to Felsenegg
Read our review →Browse the lists this tour appears in